Understanding Your Perfume Bottle and Sprayer

There are certain aspects of perfume bottles and sprayers designed to release pleasant smells into the air and to safeguard the perfume inside. They consist of a nozzle, a pump, and a dip tube. When the pump is pressed, pressure is created that forces the perfume up through the dip tube and out through the nozzle in fine mist form. There must be an airtight seal path for the liquid to move along. Thus, any blockage, leaks, or damage to one of these parts will halt the spraying action. Understanding what these parts are will make it easier to detect problems when they arise.
The Anatomy of a Perfume Bottle
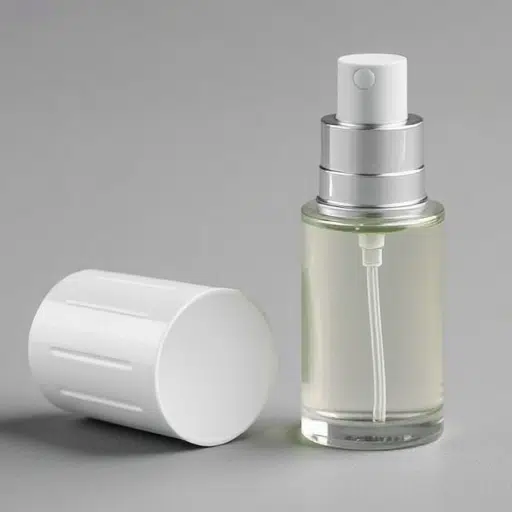
A perfume bottle is designed by its manufacturer with several constituent parts that work intricately together, each with a specific function in providing a practical design for fragrance application. The basic components of a standard perfume bottle include the reservoir, or bottle itself, the pump mechanism, the nozzle, and typically an external cap for protection.
The reservoir securely holds the liquid fragrance, typically made of glass or high-grade plastic, so that it can withstand wear and tear without chemically reacting with the perfume’s formulation. The pump mechanism, actuated by an actuator, draws the liquid upwards through a combination of air pressure and vacuum dynamics, and includes a dip tube that reaches the perfume at the base of the bottle, thereby preventing wastage.
The nozzle serves to atomize the liquid into wonderful mists, so as to dispense the fragrance best and enhance its life span on the skin. State-of-the-art nozzle designs can combine technologies to produce more evenly sprayed patterns, resulting in a better user experience and increased efficiency. Lastly, the external cap or clasp securely closes up the perfume, saving its integrity from contamination by dirt, air, or moisture.
Types of Sprayers and Nozzles
There are several types of sprayers and nozzles used in perfume bottles, including manual sprays, atomizers, fine mist nozzles, trigger sprayers, and rollerball applicators.
| Type | Feature | Usability | Efficiency |
|---|---|---|---|
| Manual Spray | Single push | High | Moderate |
| Atomizer | Fine mist | Delicate | High |
| Fine Mist Nozzle | Uniform spray | Versatile | High |
| Trigger Sprayer | Controlled | Convenient | Moderate |
| Rollerball | Direct contact | Precision | Low |
Common Materials Used in Perfume Bottles
- Glass: Its aesthetic appeal, durability, and resistance to chemical interactions with the perfume have made it a mainstream material.
- Plastic: Often used for travel-sized bottles or budget alternatives, it is lightweight and resistant to shattering.
- Metal: It is primarily used as an ornamental finish or as a protective outer layer to convey a sense of luxury.
- Ceramic: Sometimes used for niche or artisanal perfumes as it holds the fragrance for a longer time and has an unusual appearance.
- Wood: Commonly used for making caps or decorative elements; it imparts a natural and organic look to the design.
Identifying Common Issues with Perfume Sprayers

1. The Sprayer Does Not Work
This problem is often caused by a clogged nozzle, air leakage in the pump mechanism, or an empty reservoir. Dust or dried perfume residue can clog the nozzle, and any damage to the pump or the tubing can interfere with the fragrance delivery.
2. Dispersing Unevenly or Weakly
A weak spray usually indicates that the nozzle is partially clogged or that there is insufficient pressure in the pump system. Alternatively, a loose bottle can allow air to enter the sprayer, compromising its efficiency.
3. Leaking Spray Bottle
Leaking can be caused by loose fittings, damaged seals, or a cracked spray bottle. Rough handling over a prolonged period can cause the bottle to lose its sealing properties, leading to leakage.
4. Perfume Spray Not Coming Out
No spray can occur if the nozzle is completely clogged, the pump mechanism is disconnected, or the dip tube is empty. Ensuring all systems are correctly connected and clean is a remedy for resolving this issue.
Clogged Nozzles: Causes and Solutions
It is often residue buildup, such as dried product or debris, within the nozzle or spray mechanism that clogs the nozzles of spray bottles. This case is more prevalent for bottles that contain viscous liquids such as oil-based solutions or hair sprays, as such substances eventually block the minute orifices over time. Hard water deposits might also accumulate if tap water is part of the liquid.
To clean the nozzle, try to disassemble it if possible and rinse it thoroughly with warm, running water while gently massaging the nozzle opening. For stubborn clogs, it is recommended to soak the nozzle in a mixture of equal parts warm water and white vinegar for 15-20 minutes, as the vinegar can dissolve residue without harming the plastic. Also, use a fine needle or pin to clean the nozzle opening carefully, ensuring that you do not puncture or damage it. Consider replacing the nozzle if the above steps do not clear the clog. To prevent this, flush the nozzle with warm water frequently after use, and avoid using very viscous or unfiltered liquids in the spray bottle.
Faulty Pumps: Signs and Fixes
Faulty pumps can manifest in various ways, including inconsistent water pressure, unusual noises emanating from the pump, or an outright refusal to operate. In the case of diaphragm or centrifugal pumps, a frequent cause of improper function is clogged filters or an airlock. Cleaning or replacing the filters, along with proper priming of the pump, is typically the solution. Another typical fault, however, is worn-out seals or gaskets that cause leakage; these must be inspected and replaced where necessary. Proper maintenance, including lubrication of moving parts and regular checks for signs of wear, is crucial to preventing failure. Refer to the pump’s user manual for troubleshooting and repair instructions.
Airlocks: How They Occur and How to Resolve Them
Airlocks in pumping systems commonly occur when air becomes trapped in the pipes or the pump, disrupting the liquid flow. This typically occurs during the first-time pump priming, following system maintenance, or through pipe leaks that allow air to ingress. My approach to resolving airlocks is to first check for any visible leaks or loose connections in the system and tighten them if necessary. Then (if available), manually bleed the air out of the system using the provided air vents or bleed valves. If, however, the pump has run dry, before restarting, make sure that it has been fully primed by filling the casing with the appropriate liquid. I follow the routine inspection and correct priming as standard practices to prevent airlocks and maintain the best possible operation of the pump.
Step-by-Step Guide to Fix a Broken Perfume Sprayer

Step 1: Inspect the Nozzle
Begin by checking the nozzle against any possible blockage. Remove it and wash it directly with warm water to remove all traces of residue or debris.
Step 2: Check the Straw
Look at the straw inside the bottle and see if it is well attached and not bent or clogged.
Step 3: Prime the Sprayer
If the sprayer is not ejecting the liquid, try pressing the nozzle a few times to create pressure. The pressing is done firmly but not excessively.
Step 4: Cleaning the Mechanism
Cleaning the sprayer mechanism and nozzle with a cotton bud soaked in rubbing alcohol will help clear away any residue that could be hindering performance.
Step 5: Replace the Nozzle or Reset It
Resecure the nozzle, ensuring it is firmly in place. However, if the problem persists, the nozzle should be replaced entirely.
Step 6: Test Out the Sprayer
When the reassembly is complete, check the sprayer to ensure it works; if not, repeat the necessary steps to resolve the issue.
Tools and Materials Needed
- Cotton swabs
- Rubbing alcohol
- Replacement nozzle (if needed)
- Clean cloth
- Small screwdriver, possibly for removing the nozzle
- Protective gloves, maybe helpful in handling chemicals
Detailed Repair Process
Step 1: Disassembling the Sprayer
Initially, ensure the sprayer is empty and contains no liquid. By twisting it counterclockwise, the spray head gets unscrewed from the bottle. Gently remove the nozzle and any attached parts and set them aside for cleaning. Should there be other components, such as tubing or seals, in the sprayer, remove them one by one, making sure to keep track of their arrangement for reassembly. All parts should be handled carefully during this procedure to avoid damage.
Step 2: Cleaning the Nozzle and Pump
The nozzle should be cleaned by immersing it in warm, soapy water. Then, using a soft brush or toothpick, debris or buildup is removed from the spray. Rinse well with clean water and never let the soap residue remain, for it might affect the spraying action. For the pump mechanism, if disassembly is possible, disassemble it and flush it with warm water to clear any blockages inside. For severe clogging, the vinegar-water solution serves well in dissolving mineral deposits. Air-dry all parts thoroughly before final assembly to prevent moisture damage or contamination.
Step 3: Reassembling and Testing the Sprayer
To reassemble the sprayer, begin by placing the pump mechanism back onto the nozzle, aligning it carefully and snapping it into place. Ensure that all components are fitted tightly, but exercise caution not to exert too much force and damage them. Fill the bottle with a small amount of clean water or alcohol, and gently pump it to test the sprayer for blockages or leaks. Observe the spraying and verify that it is applied evenly and consistently. Disassemble the components again and inspect for residue or misalignment if the problem persists; adjust accordingly. Handle the assembly with care at all times to prevent damage to the perfume bottle’s sprayer system.
Preventing Future Problems with Your Perfume Sprayer

To prevent any future issues with your perfume sprayer, gently store the bottle in an upright position in a cool, dry spot, away from sunlight, to avoid heat or UV reactions. Regularly clean the sprayer nozzle by gently wiping it with a soft cloth to remove any residues. Never twist the nozzle shut too tightly while pumping with force; either act may weaken part of the mechanism. The other side of the coin is that after use, make sure to close the bottle properly, thereby minimizing evaporation and contamination. Maintenance through proper care will enable the perfume sprayer system to continue serving you well.
Best Practices for Storing Perfume Bottles
Correct storage of perfume bottles is a crucial factor that maintains the fragrance’s composition and prolongs its duration. According to standard industry procedure, updated with recent guidelines, perfume bottles should be stored in a cool, dry place, away from direct sunlight and fluctuating temperatures. Heat, light, and humidity all cause fast deterioration of the chemical structure of the fragrance, and hence, a significant alteration in its scent profile would be felt. It is generally advised that perfume bottles should be kept in their original packaging or another storage box that keeps the light out.
Consequently, placing the bottles inside a dark cabinet, in a drawer, or within a fridge specifically designed for perfumes, where the temperature is consistently set (usually between 55°F and 72°F), would surely work well. A high-humidity environment, such as the bathroom, should be avoided at all costs, as moisture can penetrate the jar, thereby diluting the perfume and potentially leading to its degradation. Securely fasten the cap or stopper after use to guard against evaporation and oxidation. The above steps are the best way to caring for perfumes in light of present-day directions, ensuring that your perfumes will stay alive and true to their agreed-upon scent for an extended time.
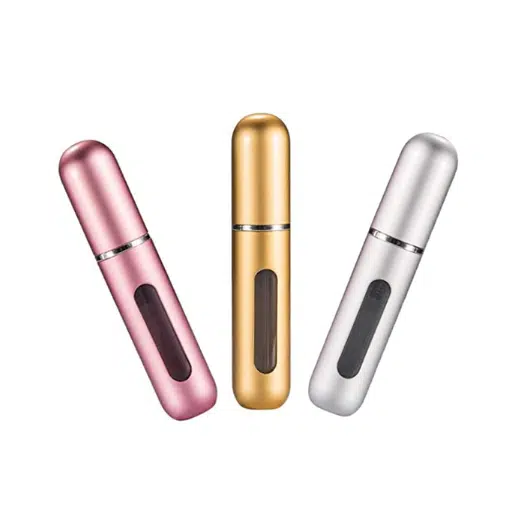
Tips for Refilling Refillable Perfume Containers
- Clean Your Container: Always ensure your container is clean before refilling to minimize the possibility of scent contamination. Rinse with an alcohol-based solution, compatible with any scent residue you may have, and let it dry completely.
- Use the Proper Funnel or Refill Tools: To avoid spilling any precious liquid and to ensure maximum accuracy, always use the funnel or refill tool that accompanies your fragrance. This will keep your refill efficient and reduce the wastage of valuable liquid.
- Handle the Bottle Carefully: You want to make sure that you are on a stable flat surface while refilling, and hold both the refill container and the empty bottle so it will not accidentally drop or spill.
- Do Not Overfill: Leave some space at the top of the container to allow for expansion of the liquid due to temperature change. Too much at the top will cause spilling, or it will be hard to put the lid back.
- Seal After Refilling: Seal as soon as possible to prevent evaporation and maintain the full strength of the fragrance. Check once more to ensure a tight fit. In general, sealing helps preserve the fragrance.
Maintaining the Nozzle and Pump Mechanism
To maintain perfume bottles in top form, maintaining the nozzle and pump mechanism is crucial. Cleaning the pump and nozzle with a soft, lint-free cloth is a start to keep any residue/photo-blocking buildup to a minimum. One should never wash the components with water or harsh chemicals since this can damage the mechanism. Should the nozzle become clogged to a certain extent, gently disconnect it, if possible, and soak it in warm, soapy water. Then, rinse and allow it to dry completely before reconnecting. If the pump does not work efficiently, avoid using excessive pressure that may cause additional wear and tear on the mechanism. Store the bottle upright in a cool, dry place away from humidity or temperature fluctuations that might affect the integrity of the mechanism. By carrying out these steps regularly, the accuracy and efficiency of the perfume’s delivery system would be maintained.
Troubleshooting Techniques for Perfume Sprayers

If your perfume sprayer is not working well, start by checking if the nozzle is clogged. Remove the nozzle and rinse it under warm water to clear any blockage. The straws inside the bottle should be checked next to verify if they are correctly aligned and not damaged. To test for weak sprays, ensure there is enough liquid inside the bottle, as it may need to build up sufficient pressure. If you see any air bubbles trapped inside the straw, pump it a couple of times to prime the sprayer. Finally, check the sprayer mechanism for wear or cracks and replace any faulty parts.
Identifying Issues Through Performance Tests
Performance tests in perfume sprayers are a methodical procedure for testing the sprayer against various working conditions. First, the spray pattern is checked to observe whether the spray is fine and even over time because any newsletter from time to time might be due to some form of obstruction or misalignment. The pressure is then measured and tested by pushing hard into the top of the spray and observing the volume being sprayed over a certain distance. Malfunctions should lead to blockage inspections or leaks on the nozzle or the straw itself. The malfunction mechanisms are repeatedly primed to force out any residual air that could obstruct performance. Continuous blockage problems may lead to a cross-reference of a sprayer specification to verify if it can work well with your liquid viscosity, as a thicker formulation requires a very robust mechanism for proper spraying. The more sprayers are maintained and regularly cleaned, the fewer operational faults they experience and the longer their lifespans are.
Common Quick Fixes for Immediate Problems
1. Unclogging the Nozzle
If the sprayer is not dispersing the perfume, detach the nozzle and rinse it under warm water to remove any clogs caused by dried liquid that has formed inside. For stubborn clogs, soak the nozzle for an hour in a mixture of water and vinegar or use a thin needle to dislodge the obstruction gently.
2. Unclogging Weak Spray or No Spray
Verify that the bottle is sealed correctly and that the straw is fully submerged in the liquid. Ensure that there are no air leaks in any of the sprayer components and that the pump mechanism is functioning properly. If air has entered the system, pump it several times to restart normal operation.
3. Fixing Leaks
Check joinings between the bottle and sprayer for loose fittings or cracks. Tighten loose components and replace any worn-out parts, like damaged rubber seals, to avoid further leakage. A compatible spray head should be used to make sure fit is correct and to prevent recurring leaks.
4. Dealing with Stiff or Jammed Pumps
Lightly lubricate the pump assembly with one drop of mineral oil if it becomes stiff. Avoid forcing the pump mechanism since this could further damage the internal components. Clean the pump mechanism regularly to prevent residue build-up, which can cause jamming
5. Correcting Mist Consistency Problems
Uneven spraying results from the misalignment of the spray head or improper cleaning of the spray head. Adjust the nozzle to ensure it is appropriately aligned and unobstructed. Maintain regular cleaning of the sprayer and avoid using perfumes containing particles that could clog the sprayer mechanism.
When to Seek Professional Help
If I find that the sprayer continues to malfunction after proper cleaning and alignment of the nozzle, or in cases of internal issues such as leakage or inability to pump, I would certainly seek professional assistance. Persistent problems, despite regular maintenance, often indicate that internal damage or component failure requires expert repair or replacement.
Reference Sources
-
How to Fix a Perfume Bottle That Won’t Spray: Easy Solutions – This guide provides practical tips for addressing uneven spraying issues.
-
How to Repair a Jammed Nozzle on a Perfume Bottle – A step-by-step guide from iFixit on repairing jammed nozzles.
-
How to Fix a Broken Perfume Bottle: Tips and Tricks – Offers solutions for clogged sprayers, including soaking in warm water or alcohol.
Frequently Asked Questions (FAQs)
How to repair a perfume bottle that won’t spray?
The perfume bottle won’t spray either because the nozzle is closed or the spray mechanism is broken. Remove the cap and check if the nozzle is clogged in any way. Twist it gently, or if necessary, use pliers to remove it from the bottle, allowing for thorough cleaning. Rinse it under a hot stream of water to wash away any obstruction of residue that would block the perfume.
What to do if your sprayer is broken?
You may attempt to repair the sprayer by first identifying the damage. Inspect the nozzle for any cracks or listen for any malfunction in the spray mechanism. A simple cleaning may be all that’s needed if the nozzle is blocked by debris. For other damages, it is better to replace the nozzle with a compatible one, which usually can be found in a perfume shop.
How to restore a perfume spray’s functionality?
Kick-starting the process to restore the functionality of a perfume spray involves inspecting the nozzle and bottle for blockages and damage. If the ball is stuck in the nozzle, try twisting it slightly or cleaning it with a cotton ball. Another way is to decant the perfume to another spray bottle if the original is beyond repair. Regular cleaning will, of course, minimize the possibility of future blockages.
Can you mend a broken perfume nozzle?
One can mend a broken perfume nozzle after first removing it from the bottle of perfume. Check thoroughly for cracks or damage. If it’s just clogged, then soak it in hot, running water or clean it with a cotton ball. When the damage is greater, then buy a new nozzle that is compatible with your bottle.
Why does my perfume bottle spray only a minuscule mist?
The perfume bottle sprays a fine mist when the nozzle is half clogged. The spray nozzle should be cleaned with warm water. Also, ensure the bottle is held upside down while spraying, as that would best distribute the aroma. If the problem persists, a replacement of the nozzle may be necessary.
What if my fragrance sprayer gets stuck?
If your fragrance sprayer gets stuck, take off the cap and inspect the nozzle. One common reason is a buildup of residue that blocks the spray mechanism. You could very gently pull on the nozzle with pliers, but be careful not to break it. Rinsing it under hot running water might also help get it moving.
How do I decant perfume into a spray bottle?
When decanting perfume into a spray bottle, ensure that the new bottle is clean and compatible with your fragrance. Then, you could use a funnel or a plastic tube to pour the liquid without spilling. Be careful when pouring to avoid contaminating the liquid. After transferring, test the new spray to ensure it is working properly.
What are the signs of a clogged perfume sprayer?
The warning sign of a clogged sprayer is diminished spraying; it sprays a fine mist instead of producing a strong spray. You may even notice some perfume residue building up around the nozzle. Cleaning it regularly would, of course, prevent this from happening and keep the sprayer fully functional.
Can I replace the nozzle of my perfume bottle?
Indeed, you can replace your perfume bottle nozzle if it happens to be damaged or blocked beyond repair. Then look for one that fits your specific bottle type. In most cases, these can be found at a local perfume shop or searched for online. Always follow the proper instructions when attaching to ensure the spray’s full functionality.