The process of opening a reed diffuser cap may seem easy enough. Still, if you don’t do it properly, you could find yourselves spilling the precious fragrance, breaking of the bottles, or even damaging the reeds themselves — enough to turn a relaxing setup into a frustrating experience. Setting up your first diffuser or replacing the fragrance oil in a long-time favorite, an understanding of the proper technique is vital. This guide aims to walk you through the entire process step by step, along with tips for keeping things clean and hassle-free while preserving the longevity of your diffuser. By the end, you should feel confident in handling your diffuser and enjoying the soothing aroma it brings.
Understanding Reed Diffusers
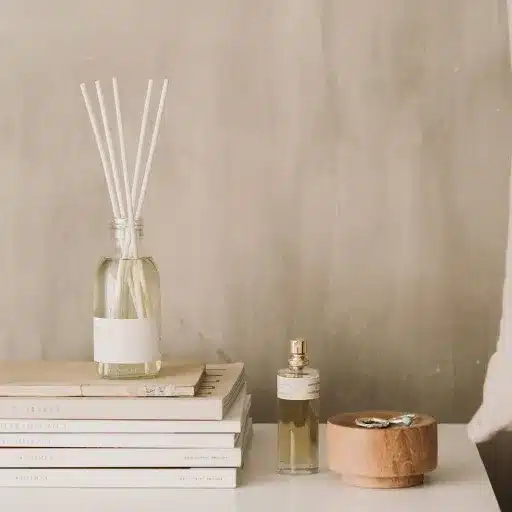
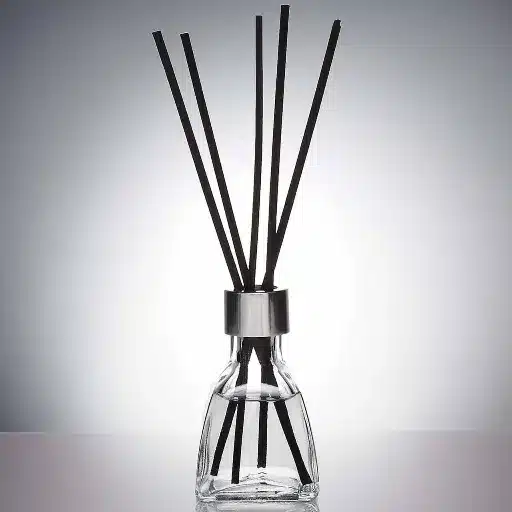
A great oldie but goodie for setting fragrances is the reed diffuser. The infinite beauty of these diffusers lies in their ability to produce aromas without the need for heat or electricity. The typical setting consists of reeds, either natural or synthetic, soaking in a container of fragrant oil. These reeds absorb the oil and release the lovely scent into the ambient air. The beauty of these units is that they require no maintenance, last for a long time, and produce a subtle, soft aroma that is suitable for every home and office.
What is a Reed Diffuser?
The Reed diffuser is one of the well-known home fragrance systems that dispense pleasing odours without the need for spark, heat, or electricity. It comprises a container filled with fragrance oil specially formulated and set with natural or synthetic reeds. The reeds are like wicks in that they absorb the oil and gently unleash the fragrance into the air. They are preferred due to their convenience and low maintenance, and provide a low-to-medium level of scent diffusion that creates a very subtle ambiance in the room. There has been a recent surge of interest in reed diffusers due to their environmental friendliness and safer alternative to candles or plug-in air fresheners. Moreover, they come in a variety of scents and design options that complement modern decor very well.
Components of a Reed Diffuser
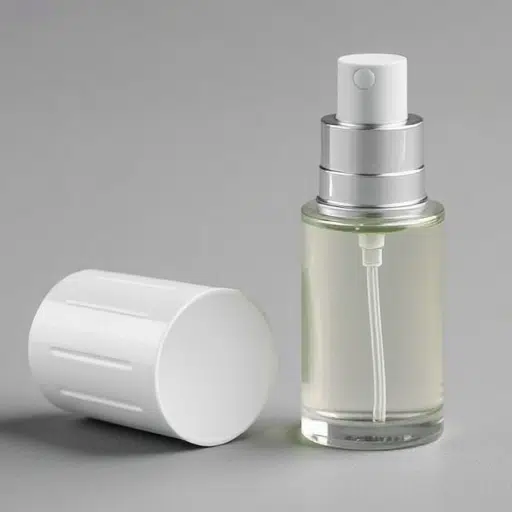
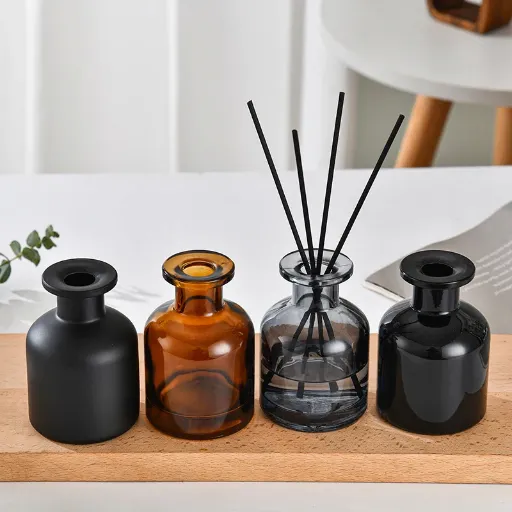
- Diffuser Bottle: Typically, a glass or ceramic bottle designed to hold fragrance oil, suitable for the purpose and complementing the décor.
- Reed Sticks: Normally, rattan or bamboo sticks with tiny channels that help absorb the fragrance oil and diffuse it into the air intermittently.
- Fragrance Oil: A scented liquid, whether natural or made, which is absorbed by the reeds and diffuses into the surrounding air.
- Cap or Stopper: Some reed diffusers have a cap or stopper to seal the bottle before use, conserving the fragrance.
- Decorative Accessories (optional): Items such as labels, ribbons, or embellishments to increase the appeal of the diffuser.
How Reed Diffusers Work
Reed diffusers perform with a process called capillary action. The reeds, made with countless microscopic channels, pull the fragrance oil up the sides of the bottle and trickle them into the air. In this way, the scent disperses naturally and continuously without the aid of heat, flames, or electricity.
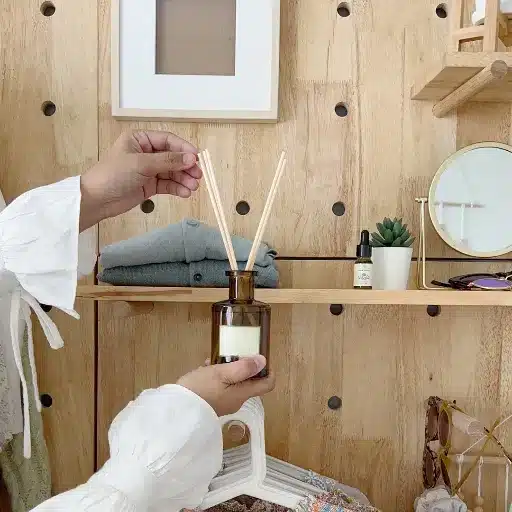
Once the reeds are dipped into the bottle of fragrance oil, it is continuously and slowly absorbed along the path of the reed until it reaches the top end. It opens up and begins to evaporate into the surrounding atmosphere, giving forth an aroma. To ensure the reed’s optimal performance, very smooth and uniform channels are required in the wind to distribute the scent evenly.
The performance of reed diffusers varies based on fragrance oil composition, the number of reeds used, the quality of reeds, and the room size. For instance, research shows that larger spaces tend to have more reeds or a stronger fragrance oil to keep a perceptible scent. Moreover, flipping the reeds roughly once a week helps invigorate the diffusion process, allowing for a constant scent to be maintained.
Preparing to Open a Reed Diffuser Cap
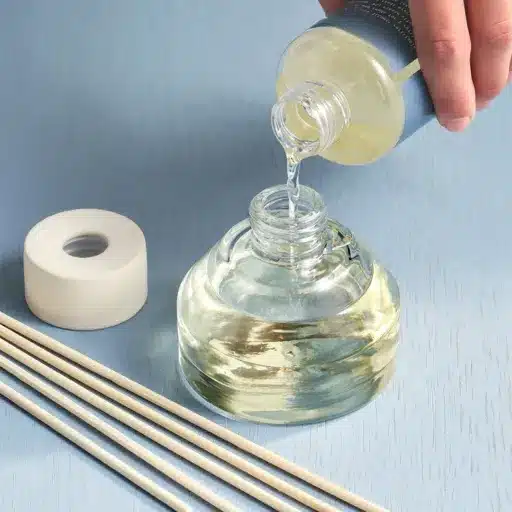
To open the cap of the reed diffuser, hold the bottle firmly to prevent it from tipping over and spilling. Depending on the bottle’s design, the cap can be twisted or popped open. If you find the cap sealed with plastic or a stopper, use scissors or another suitable tool to remove it, and be careful not to damage the bottle or spill the fragrance. After opening the bottle, insert the reeds and allow them time to absorb the oil; diffusion begins!
Choosing the Right Tools
To open a reed diffuser cap, simple means can be used: scissors or small, flat-edged tools are used to remove the cap that is sealed with a stopper. It should have a secure grip, and one should be able to manipulate it with ease, so that an accident does not occur. Your hands are usually enough to twist off caps, unless they have been tightly sealed with a rubber grip. Always work on a flat, steady surface to ensure drop-free working conditions. Carry a towel or tissue in case a leak occurs.
Safety Precautions to Consider
- When unsealing a reed diffuser bottle, always ensure adequate ventilation to prevent inhaling the concentrated scent of the fragrance oils directly.
- If there are fragile or sharp materials inside the diffuser bottle, handle it with care to prevent breakages or injuries.
- If your skin is sensitive, wear protective gloves since some of the fragrance oils may irritate you upon contact.
- Keep the diffuser out of reach of children and pets during this process to prevent accidents, spills, or ingestion.
- Finally, forcibly opening the bottle could splash oils, much to the delight of stains and unwanted exposure!
Identifying Stuck or Tight Caps
The first step in removing an exceptionally stiff closure is to ensure that the hands on the job are clean and dry to maintain maximum friction. If the jar proves difficult to open after that, the next step would be to place a rubber band around the cap to enhance grip. Some may even find that a damp cloth works wonders. Slightly heating the cap with warm water or a hairdryer on low heat may work on very stubborn ones. Do not exert too much force, as this may cause spills or breakage of the bottle. Exercise caution to avoid mishaps and messes during the process.
Step-by-Step Guide to Open a Reed Diffuser Cap
Complete Opening Process
- 1
Prepare for the Task: Place any tools such as rubber bands or a warming cloth or use a hairdryer to help with the opening, if needed. - 2
Ensure a Steady Work Surface: Place the bottle of the reed diffuser on a secure and flat surface to avoid any tipping during the operation. - 3
Check the Cap Type: Most reed diffusers have a protective seal or stopper underneath the outer cap. Depending on the design, you might encounter a basic screw-on cap or a plastic plug or cork. - 4
Rub the Cap with the Rubber Band: Wrap a thick rubber band around the cap to enhance grip and prevent slipping. - 5
Use Damp Cloth in Case Grip is Weak: If the grip is very tight, gripping the cap with a damp cloth might help in twisting it free. - 6
Apply a Touch of Warmth: If the cap is too tight, warm it briefly with warm water or set the hairdryer at a low setting to give it a little loosen-up. - 7
Twist and Unscrew: In the presence of a screw cap, gently hold the neck of the bottle so that opening requires a twist in the counterclockwise direction. Ensure to firmly hold the bottle while releasing the cap to prevent any accidental spills. - 8
Remove the Plastic Seal or Cork: With the outer cap off, take a good look at the opening to determine if an extra seal resides there. Plastic stoppers can either be pulled out with fingers or pried out using a small tool like a butter knife. For cork seals, just a gentle tug should do the trick. - 9
Wipe Off Spills: After the cap has been removed, wipe the bottle’s rim from excess oil and proceed with inserting the reeds. - 10
Dispose of Packaging Safely: Dispose of the protective seal or any covering of the cap correctly to prevent a mess or accidental spills.
Important Safety Reminders:
- Beware of Spillage: Place the diffuser on a flat surface to prevent potential spillage during use. Have a paper towel ready for quick wipe-ups in case of any spills.
- Protect Hands: If the seal is stubborn and feels slippery to hold, use a rubber grip or a damp cloth to help you keep it more securely. Try not to use too much force; otherwise, you might break the bottle or spill the fragrance oil.
- Refer to the Manufacturer’s Instructions: When in doubt, consult the instructions provided with the diffuser or visit the manufacturer’s website for detailed information.
Identifying the Type of Diffuser Bottle
The type of diffuser bottle can be identified by examining its shape and distinctive features. Reed diffusers typically have an empty neck to hold the reeds, through which the fragrance is released. Electric diffusers normally feature a plug or USB connector and can be easily detached with buttons for adjusting settings. Alternatively, a glass reservoir is typically found in a nebulizing diffuser, which operates without the need for reeds and does not require water or heat. By matching these characteristics with your bottle, you will find it very easy to identify the kind of diffuser bottle.
Troubleshooting Issues with Diffuser Caps
Dealing with Stuck Caps
If your diffuser cap is stuck, there are several techniques you can try to dislodge it without causing damage. Run warm (never hot) water over the cap for a few seconds, allowing it to loosen dried-down oil or residue that might be causing it to stick. A rubber glove or grip pad can be chosen to reduce effort when twisting off the cap. Should these methods fail, try wrapping a thick rubber band around the cap to enhance grip. For very resistant caps, a pair of pliers can be used, but apply gentle pressure evenly to avoid cracking the cap. Always be patient and move with caution, for any damage to the diffuser or spills of the fragrance oil should be avoided.
What to Do if the Diffuser Bottle Breaks
For instance, if the bottle with the aroma had to break, I would carefully clear the shattered glass while wearing gloves to protect my hands, and then deposit it in a sturdy container. Any spilled fragrance oil is immediately wiped away using disposable paper towels, while the room is ventilated to minimize the strong smell. I then clean the area with warm, soapy water to remove any residue that may have been left behind, thus making it safe and clean.
Replacing a Damaged Diffuser Cap
Should your diffuser cap get damaged, replacing it is a basic procedure. Ensure the bottle is placed right-side-up to prevent the fragrance oil from spilling. Take off the broken or damaged cap, being careful not to squeeze or accidentally spill the fragrance oil. Try to locate a replacement cap that matches the size and material of the original. Replacement caps can often be obtained from the manufacturer of your diffuser or purchased online. Before placing the new cap on the bottle, ensure the neck is clean with a cloth, removing any oil residue to allow for a tight fit. Proper sealing of the new cap will restore the proper function of your diffuser, preventing continued leakage or evaporation.
Replacing the Cap Correctly
The original cap on the reed diffuser may leak or otherwise release the fragrance oil’s aroma if it is not closed tightly after opening. I gently align the cap, ensuring it is never cross-threaded to prevent damage to the threads. If the original cap is unusable, then I use a compatible replacement from the manufacturer. This prevents the diffuser from becoming ineffective or causing any further mess.
Maintaining Your Reed Diffuser
Whatever you do for a reed diffuser, avoid placing it under the sun or in drafty circumstances, as the fragrance is bound to dissipate swiftly. Occasionally, turning the reeds serves to reinstate the scent, but not soaking them too much. Keep a clean bottle and refill it with good-quality fragrance oil as needed to maintain the diffuser’s performance and longevity.
How to Properly Refill a Reed Diffuser
The refilling process is simple and ensures the diffuser continues to function correctly while preserving the fragrance’s quality. Before refilling, ensure that the bottle is empty and has been thoroughly washed with warm, soapy water to remove any residues that may be left behind. Allow the bottle to dry completely to prevent diluting the new fragrance oil. Pour into the cleaned bottle as much high-quality fragrance oil as desired, filling it only halfway. The reason goes: that gives room to absorb the scent from the reeds and permits the fragrance to be released suitably. Fresh reeds must be put in place of old ones, as the old reeds might get choked with oil over time and lose the ability to diffuse scents properly. After inserting the new reeds, allow them to soak for approximately five minutes, then flip them over to expedite the diffusion process. Continue to maintain your diffuser as usual, being careful when handling the oils to prevent spills or stains on surfaces.
Extending the Life of Your Diffuser
To increase the longevity of any diffuser, proper maintenance is necessary. Ensure that your diffuser is positioned in a place that does not receive direct sunlight or warm from any heat-generating appliance, as prolonged exposure can cause oil degradation and a reduction in potency. Clean the bottle regularly, and replace the reeds every few months for optimal diffusion. Be sure to consider high-quality oils, as they generally last longer and have a more consistent scent. If you encounter the issue of faded fragrance, flip the reeds more frequently and consider using fewer reeds to slow down absorption. I hope these tips serve you well, extending the life of your diffuser and enhancing your aroma experience.
Choosing the Right Scent for Your Space
Before finalizing a scent for your space, consider the room’s purpose and the atmosphere you want to achieve. Take into account the size of the room as strong fragrances might overwhelm smaller spaces. At last, do explore checking whether the fragrance really suits your taste, for you want a homely ambience to feel liberated in.
Frequently Asked Questions (FAQs)
Reference Sources
- How to open The Body Shop Reed Diffusers (YouTube) – A video guide demonstrating how to open reed diffuser caps using scissors and proper techniques.
- How to Open Reed Diffuser Bottle: A Beginner’s Guide (Daxin Glass Bottles)– A detailed guide on opening different types of reed diffuser caps, including corked bottles.
- How do I get the top off this reed diffuser? (Reddit) – A community discussion with practical tips, such as using heat to loosen the stopper.
Final Thoughts
Remember to be cautious handling reeds and oils because some fragrance oils can leave stains on surfaces or irritate skin. And with that, you’ve opened the reed diffuser cap safely and can now enjoy the pleasant aroma in the air.